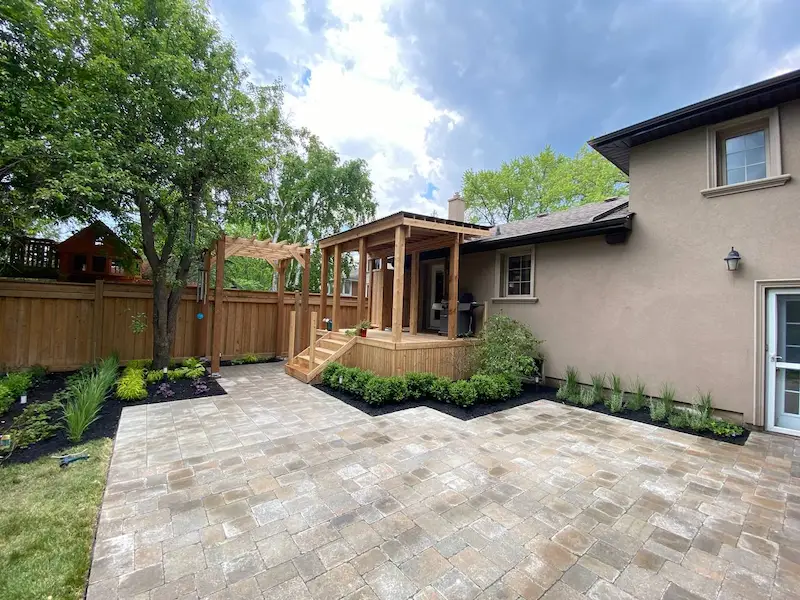

Honestly, your driveway functions as the red carpet leading to your residence. Visitors see this surface first when they arrive, and similar to a great outfit, it establishes the mood for everything following. Living in Toronto or anywhere across GTA, you’ve probably noticed driveways experiencing a serious style moment currently. Gone are the days when simple concrete slabs would suffice. Today’s homeowners treat their driveways like genuine design statements, and the results are absolutely stunning.
Modern interlock driveways have become go-to choices for people wanting something both gorgeous and practical – because honestly, we need surfaces that handle everything from summer barbecues to brutal Canadian winters. It’s like selecting perfect boots that look amazing while also managing Toronto snowstorms.
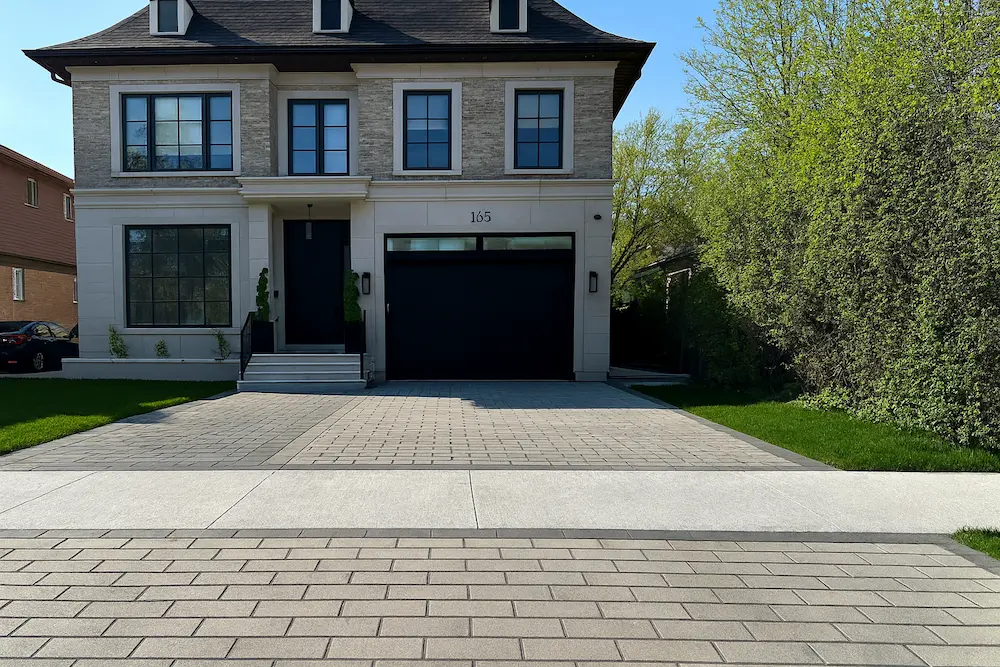
Driveway Design as Part of Home Aesthetics

Think of your driveway as the foundation of your home’s entire outdoor look. Just like you wouldn’t wear a ball gown with hiking boots, your driveway needs to work harmoniously with your house’s architecture and your landscape design. The best driveway paver designs create this seamless flow that makes your whole property feel intentional and put-together.
What’s truly exciting involves homeowners beginning to see driveways as outdoor flooring – extensions of living spaces rather than merely car parking areas. This shift in thinking has opened up incredible possibilities for creativity and personal expression. Whether you’re working with a charming century home in downtown Toronto or a sleek modern build in Mississauga, there’s a driveway design that can enhance your home’s unique character.
New Styles and Materials
Modern Minimalism and Clean Lines
The minimalist trend that’s been dominating interior design has found its way outside, and honestly, it looks fantastic. Interlock driveway designs embrace this aesthetic focus on clean, uncluttered lines that let the quality of materials shine through. Think of it as the “less is more” approach to outdoor design.
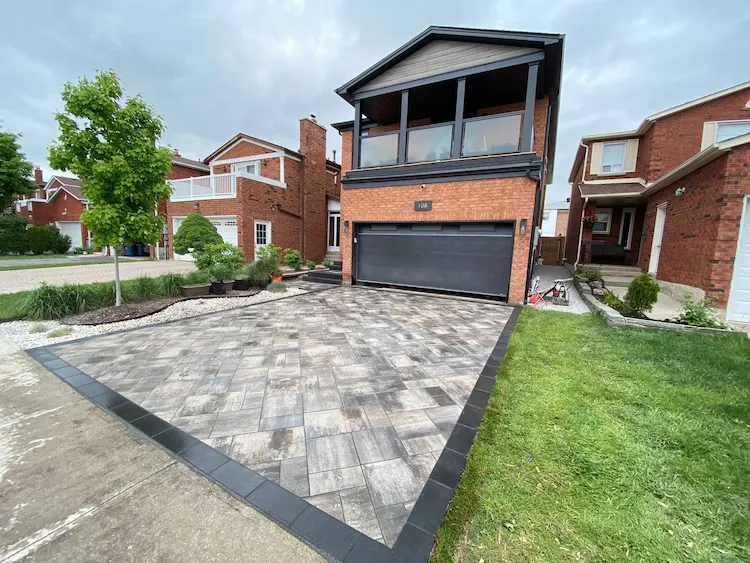
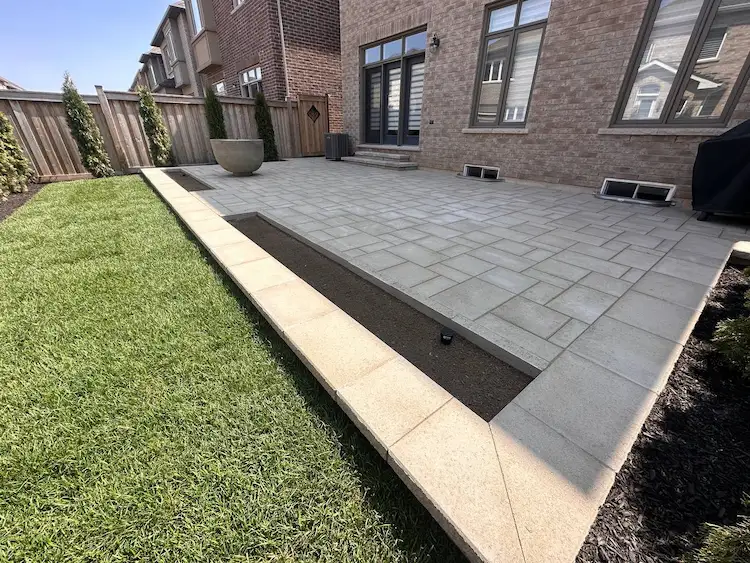
Large-format slabs in neutral tones are a leading 2025 trend noted across industry roundups and manufacturer releases. These create expansive, uninterrupted surfaces that make your space feel larger and more luxurious. The beauty lies in the restraint – when you choose high-quality stones with subtle natural variations, you get visual interest without the chaos. It’s elegant, timeless, and surprisingly versatile.
Decorative Driveway Interlock Elements
Now, minimalism doesn’t mean boring. The smartest driveway design ideas incorporate decorative elements as thoughtful accents rather than overwhelming features. Think of it like accessorizing – a beautiful border treatment or subtle inlay pattern can be the perfect finishing touch that elevates the entire design.
Border treatments are particularly popular right now. They create definition between different areas of your outdoor space while adding that extra layer of sophistication. It’s like adding trim to a room – it just makes everything look more finished and intentional.
Sustainable and Permeable Materials
Here’s where things get really interesting. Eco-conscious homeowners are making a real shift toward permeable pavers that let water filter through instead of pooling on top. These sustainable options reduce runoff, manage stormwater naturally, and in some Toronto-area communities, they can even qualify you for municipal rebates. That’s a win you can actually feel good about.
The thing is, choosing permeable doesn’t mean settling for less beauty or longevity. Modern interlock driveway designs using these materials come in styles, colours, and textures that rival traditional options — but like any outdoor surface, they benefit from periodic upkeep. Light cleaning, joint refilling, and occasional interlock surface repair and maintenance keep the drainage system performing efficiently year after year.
They’re especially valuable in spring, when Toronto’s rainfall typically increases through the season, raising the importance of on-site drainage. With proper care, permeable pavements not only reduce runoff but have been shown in cold-climate studies to lessen surface icing and salt use compared with conventional pavements.
Popular Driveway Paver Designs and Patterns
Classic Brick and Concrete Styles
Sometimes the classics never go out of style, they just get better. Traditional materials have evolved dramatically, with manufacturers creating new textures and finishes that honor timeless aesthetics while meeting today’s performance standards. Driveway front yard interlock designs often feature updated takes on classic brick patterns, but with improved durability and weather resistance.
Concrete pavers have had a complete glow-up. Today’s options can look like natural stone, aged brick, or even custom textures, all while offering superior durability and easier maintenance. It’s like getting designer looks at accessible prices.
Geometric and Custom Layouts
Bold interlocking brick patterns are embracing geometric shapes that create real visual impact. Bold geometric layouts—chevron, herringbone, diamonds, and hexagons—are widely cited as on-trend for 2025 driveway work. These patterns work beautifully with contemporary architecture, creating strong visual connections between your driveway and your home’s design language.
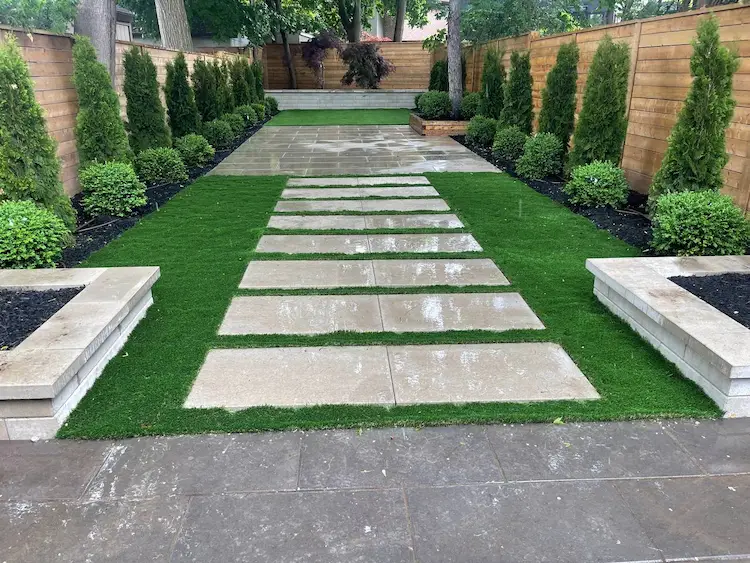
Custom layouts are where you can really let personality shine. Professional contractors are getting incredibly creative, incorporating curves, multiple materials, and complex driveway paver patterns, transforming driveways into true art pieces.
Textured and Stamped Surfaces
Texture is everything when it comes to both looks and functionality. Driveway patterns with varied textures create visual interest while providing better traction – crucial for our Canadian winters. The latest texturing techniques can replicate natural materials while offering consistency and durability of engineered products.
Stamped concrete driveway patterns add depth and character, creating shadows and highlights that change throughout the days. These dynamic surfaces stay interesting in all lighting conditions, ensuring driveways look spectacular from morning coffee to evening wine.
How to Choose the Right Pattern and Material
Choosing the perfect combination feels overwhelming at first, but it’s really about balancing your home’s style, your site’s specific needs, your budget, and your personal taste. The key is thinking about how all these elements work together to create something that feels authentically you.
Professional consultation is invaluable here. Experienced contractors understand how different materials perform in Toronto’s climate and can recommend solutions that will look amazing for decades. They’re like personal stylists for your outdoor space.
Driveway Design Ideas for Every Home Style

Local Design Ideas Inspired by Toronto Landscapes
Toronto’s incredible architectural diversity provides endless inspiration. From elegant interlock driveway design ideas that complement heritage homes in the Beaches to contemporary installations that enhance modern condos in Liberty Village, local professionals understand how to create designs that honor neighborhood character while expressing individual style.
The beauty of working with local contractors is their understanding of our unique climate challenges and municipal requirements. They know what works here and what doesn’t.
Colour Palettes and Textures
Colour selection can make or break your driveway’s visual impact. Concrete paver driveway designs showcase the incredible range available in today’s market. From warm earth tones that complement natural landscapes to cool greys that enhance contemporary architecture, the options are virtually limitless.
Geometric driveway patterns work particularly well with bold colour contrasts, creating dramatic visual effects that transform ordinary driveways into architectural features. These designs require careful planning and expert installation, but the results are absolutely worth it.
Frequently Asked Questions
How are lighting and decorative accents used in modern driveways?
Integrated lighting has become essential in contemporary driveway design, providing both safety and aesthetic benefits. Low-profile, load-rated paver lights integrated within or along the edges of the driveway provide subtle illumination and are designed to handle vehicle loads. Decorative accents like planters and water features are being incorporated more thoughtfully, serving as focal points that enhance rather than overwhelm the overall design.
Which colours are most popular for driveways?
Neutral tones continue to dominate, with charcoal grey, warm beige, and natural stone colours leading preferences. These versatile options complement diverse architectural styles while maintaining timeless appeal. However, there’s growing interest in subtle colour variations and multi-tonal installations that create depth and visual interest.
Can minimalist design still look unique?
Absolutely! Minimalist design achieves uniqueness through careful attention to proportion, material quality, and subtle details. The key lies in selecting premium materials and executing flawless installations that showcase the inherent beauty of simple, clean designs. Texture, joint patterns, and border treatments can create distinctive appearances within minimalist frameworks.
What future innovations might shape driveway interlocking?
Emerging technologies promise exciting developments in driveway design. Expect more snow-melting systems installed beneath pavers, continued advances in permeable bases, and wider use of recycled aggregates and efficient LED controls. Additionally, sustainable manufacturing processes and recycled materials are becoming increasingly important, ensuring that beautiful driveways can also support environmental responsibility.
The future of driveway design in Toronto and the GTA looks incredibly bright, with innovations that promise to make our outdoor spaces more beautiful, functional, and sustainable than ever before.
Transform Your Driveway with OAKS Home Services
Your driveway deserves the same design attention as the rest of your home — and that’s where OAKS Home Services can make all the difference. Whether you’re inspired by modern minimalism, classic brick patterns, or eco-friendly permeable pavers, our team specializes in turning design ideas into long-lasting, beautiful realities. We bring expert craftsmanship, premium materials, and years of experience working with Toronto’s climate to every project.
If you’re ready to upgrade your home’s grand entrance with a driveway that combines elegance, durability, and functionality, reach out to OAKS Home Services today. Let’s design and build a driveway that not only enhances your curb appeal but also stands strong through every season in Toronto and the GTA.